This post is sponsored by Hobby Lobby!
My crafting space may be small but it’s definitely FULL! I use every inch of space in all rooms of my house and my crafting area is no exception.
While I’m a lover of clear plastic storage bins, rolling carts and 3 ring binders purely for function, these are not always the prettiest way to fill the shelves of my craft room. Since I’m in this area so often, I not only want it organized, but decorative as well.
I made a goal at the beginning of the year to beautify this space, while getting it MORE organized. Using some items I already had in the house and shopping sales at Hobby Lobby, I was able to get everything I needed for under $100! While we all know Hobby Lobby for their great home décor selection, I was excited to see the vast storage, labeling and organizational items they have as well. And nothing tugs at my heart more than a good label 🙂 .
For this project I focused on 3 main areas:
1 Rolling Cart
In my three-tiered rolling cart, I keep all my craft essentials. When working on a new project, I simply wheel out the essentials to have on hand as needed. While this is incredibly helpful in so many ways, I struggled to keep the items within the cart stored in a neat, pretty manor.
Here’s the supplies I used (all from Hobby Lobby):
- Photo Boxes: on sale for $4.99 each
- Oval Metal Pail with Handles: on sale for $4.99 each
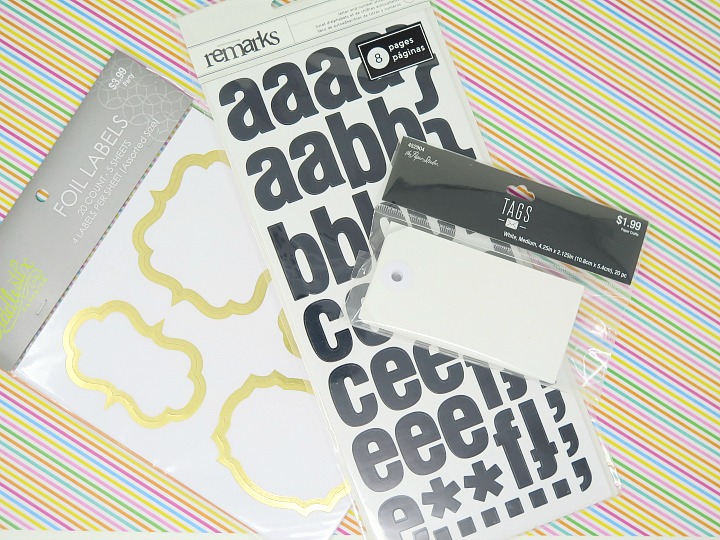
- White Sticker Labels with Gold Trim: $3.99
- Small Rectangular Containers with Spring Color Lids: on sale for $4.79 for 3
- Small Clear Compartment Organizers: $1.99-$3.99 each
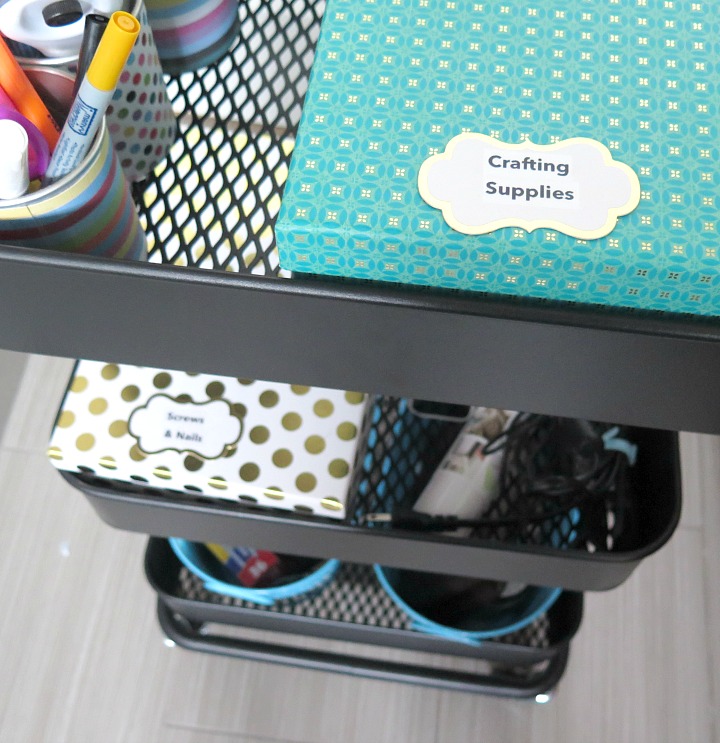
The bulkier craft supplies were placed in the colorful metal bins. Two of these fit perfectly in the bottom shelf of my cart.

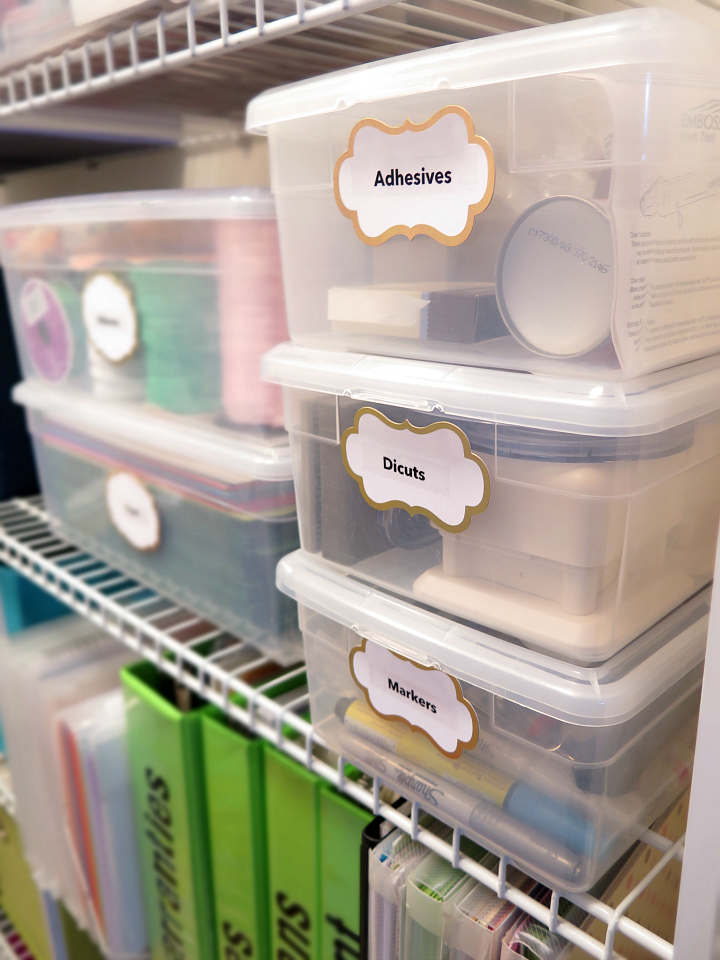
In the top and middle shelf, I used decorative photo boxes. These work really well for all sorts of storage solutions. Adding the gold rimmed sticker labels made searching for items so much easier.

I also wanted the storage inside the photo boxes to be organized and pretty, which is not always an easy feat. Smaller plastic containers were ideal for all the small items I had to store. Adding labels from my label maker to the sides of the containers helped me find what I was looking for easily and forced me to put everything away where I got it!
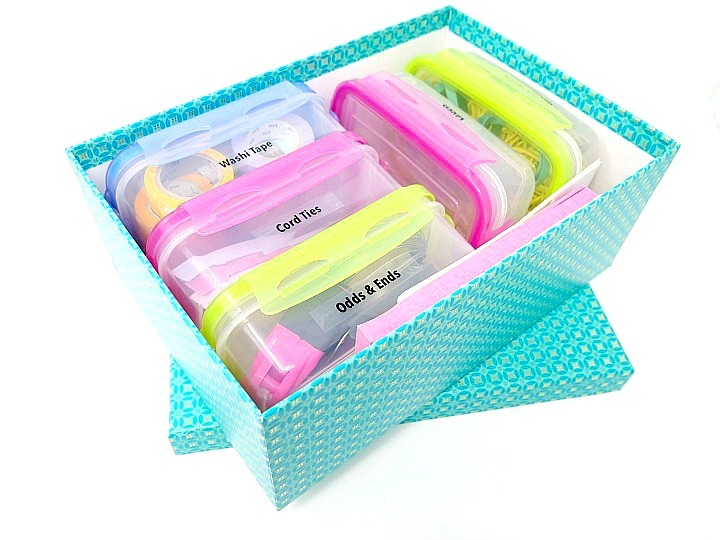
I had been struggling with a solution for storing our nails & screws for quite some time before I saw these 4-6 compartment organizers in assorted sizes. It was as if they were made to store nails!
When Joe (my husband) saw how I labeled the our nails & screws, he got a bit of a laugh … “Big”, “Medium” & “Small”. While I doubt the professionals sort their nails in such a way, it worked for us!

2 Shelf Storage
For storage on our metal wire wall shelves, I had two approaches. Some items would remain in the clear storage bins that I already owned and others would go in to new colorful cube storage bins.
Here’s the supplies I used (all from Hobby Lobby):
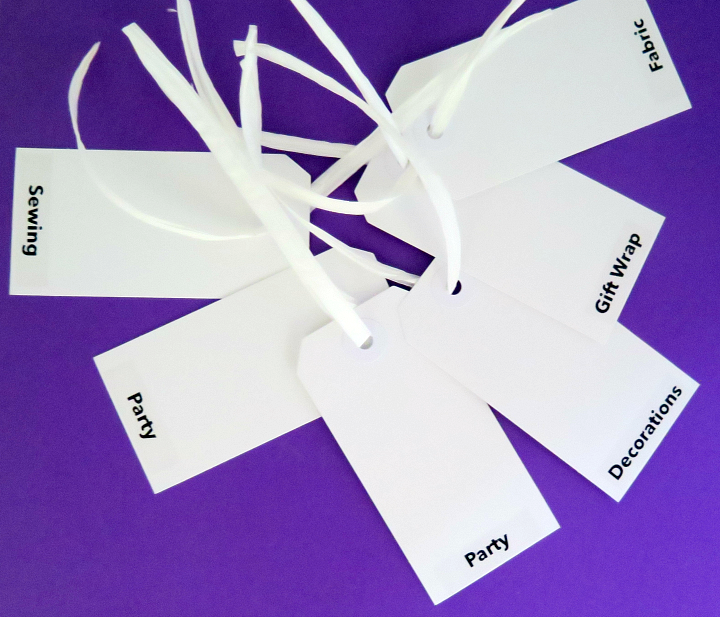
- White Gift Tags: on sale for $.99
- Foldable Storage Box: on sale for $7.99 each
- White Sticker Labels with Gold Trim (same ones I used for the photo boxes): $3.99

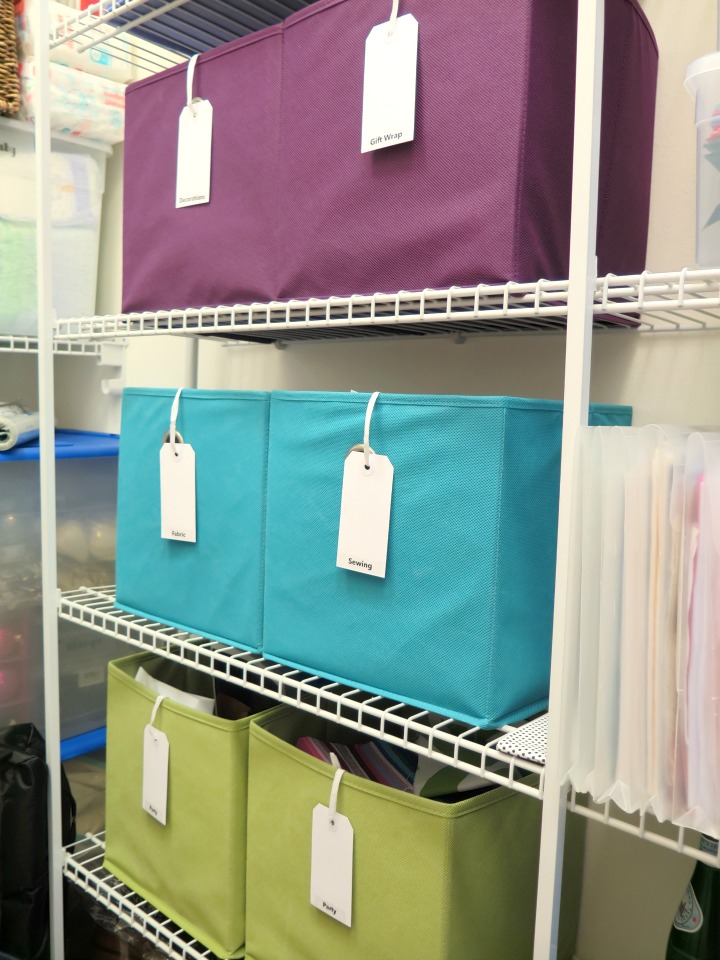
Since the shelves were filled colorful storage cubes, I opted for simple white gift tags to label each. Using my label maker, I printed the labels with small black font adhering them to the bottom of the gift tag. The result was clean and simple …. just what I wanted.
I love that this simple labeling solution is easy and affordable to swap out over time if I opt to use the bins for other purposes.
The clear storage bins needed some attractive labeling as well. The gold rimmed sticker labels used for the photo boxes were a perfect addition. They added the right amount of color and interest while still being easy to read. I kept the same clean bold font as on the gift tags. While I love creative fun fonts, I found that this simple bold design was easier on the eye which made locating items simpler.
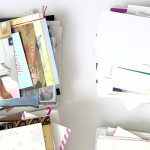
3 Paper Storage
Ugh paper. Love hate relationship. While I would love to go paperless with everything, it’s just not going to happen. EVER. So instead my goal is to make the paper storage easy to access and pleasing to the eye.
Here’s the supplies I used (all from Hobby Lobby):
- Wrapping Paper: $3.99
- Foam Board: $1.99
- Alphabet Stickers: $4.99
Have you ever tried to store 3 ring binders and folders on wire shelves? If you have, you’ll appreciate my first step: to cover some of our wire shelving with foam board. This creates an easier way to store 3 ring binders and additional craft papers. All you need is wrapping paper and foam board. Take a look at my full tutorial to create foam board shelving in just 5 minutes!

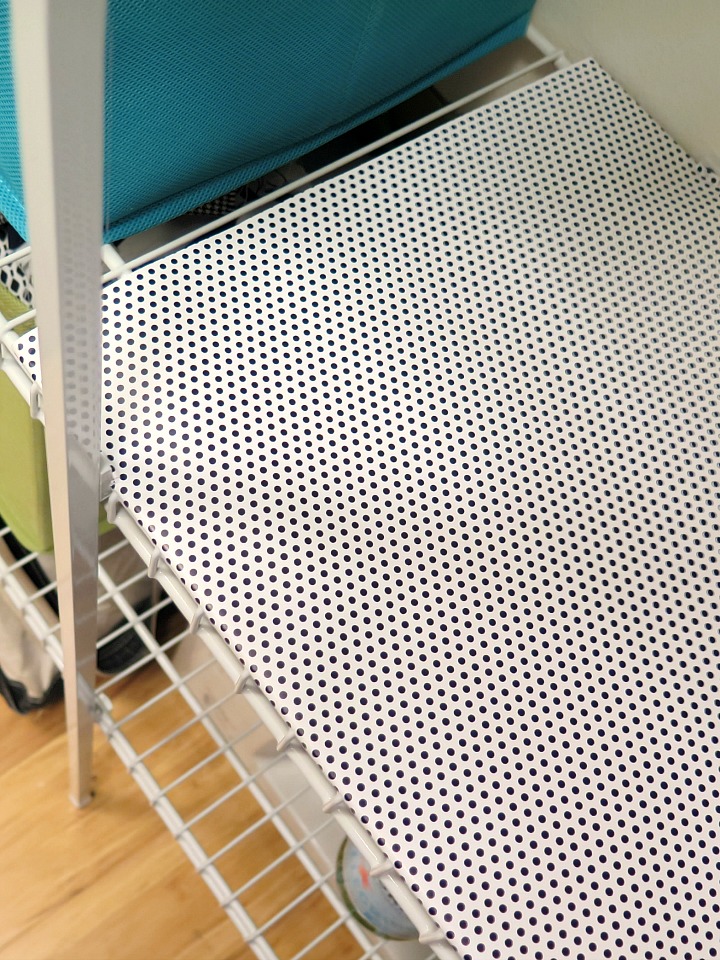
Once the foam board was placed down on the wire shelving it was much easier to store binders and paper pouches. Those green binders are a nice pop of color, but needed labeling. I made my own labels very easily from the simple black font alphabet stickers I grabbed on my Hobby Lobby trip. I made sure to get a large enough sticker size that it would be easy to read sideways!

So I’m here to tell you that even storage can look attractive! Not only attractive, but MORE organized.
Here’s a rough breakdown of how I spent my money:
- 1 Rolling Cart: $41
- 2 Shelf Storage: $45
- 3 Paper Storage: $11
TOTAL = $97
Visit: Hobby Lobby.com for these finds and much much more!
As I mentioned, many of the items I purchased were already on sale at Hobby Lobby. When I buy a regularly priced item, I always use their smart phone app to pull up the weekly coupons.
You can use the coupon below on your next trip to Hobby Lobby. Either print it out or show it to the cashier on your phone!

This is a sponsored conversation written by me on behalf of Hobby Lobby. The opinions and text are all mine.


Lindsay, what a great idea! I love those cloth storage boxes. I have them all over my house. I also have a rolling cart! I love how you organized it all on such a small budget. My kind of organizing! Great job!