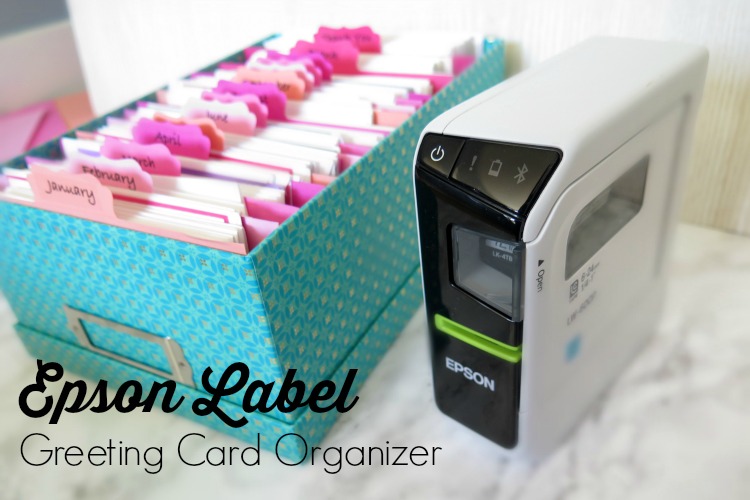
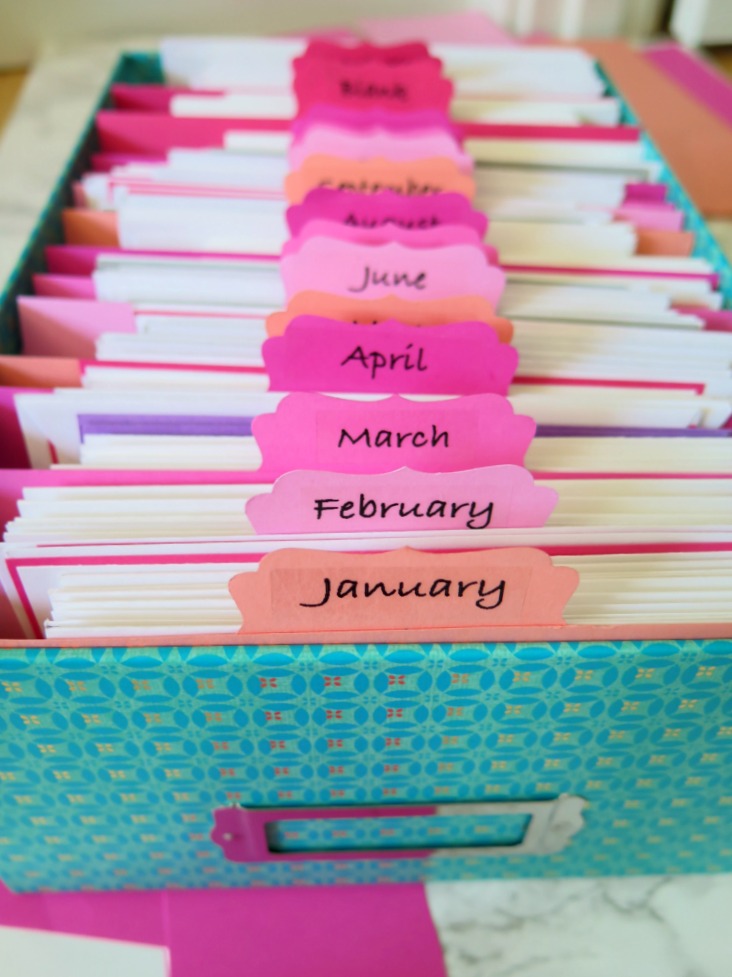
As more and more of our lives is online, Facebook, Instagram, even blogging 🙂 , there’s something I LOVE about mailing written cards for special occasions. To make writing a card just as easy as say sending a text, I put together a greeting card organizer sorted by month with my portable Epson portable Label Maker, which includes an iphone app! No more looking through my calendar to see if a friend’s birthday or special holiday is coming up. Each month I simply look for all the cards I’ve stored under that month’s label to fill out and send to my friends & family!
Before you get started creating your greeting card organizer, make a list of your friends & families’ birthdays. Whether this means pulling out your contact book, pulling up facebook or even sending a couple emails, make a full list of everyone’s birthdays who should receive a card. Next make a list of all the holidays that you’ll want cards for (Mothers Day, Fathers Day, Easter, graduations, etc.) AND who should receive those cards. I skip Christmas for this project, as we make special Christmas cards each year. Your finished product should be a master list of all the cards you’ll need for the year organized by person & month.
Now let’s create your organizer!
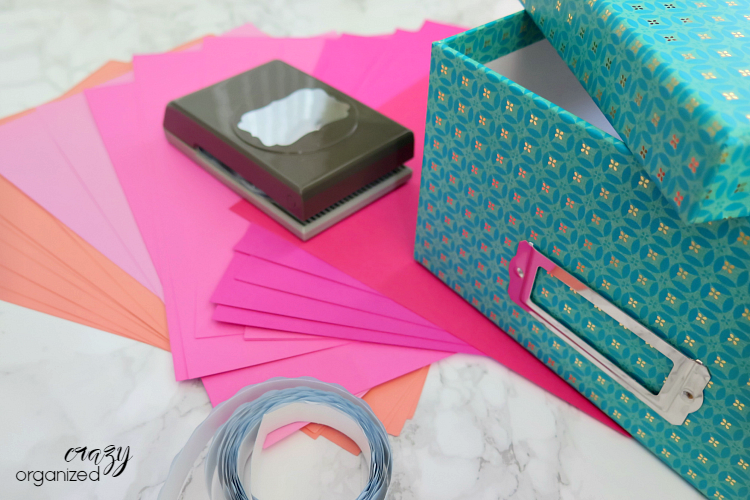
Supplies
- Thick card stock in your favorite colors
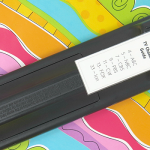
- Epson portable LW-600P Label Maker
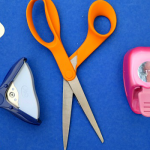
- Dicut tool in your favorite shape
- Tape (I used a roll of scrap-booking tape, but you could even use scotch tape!)
- A cute shoe box (I found mine at Joann’s)
Instructions:
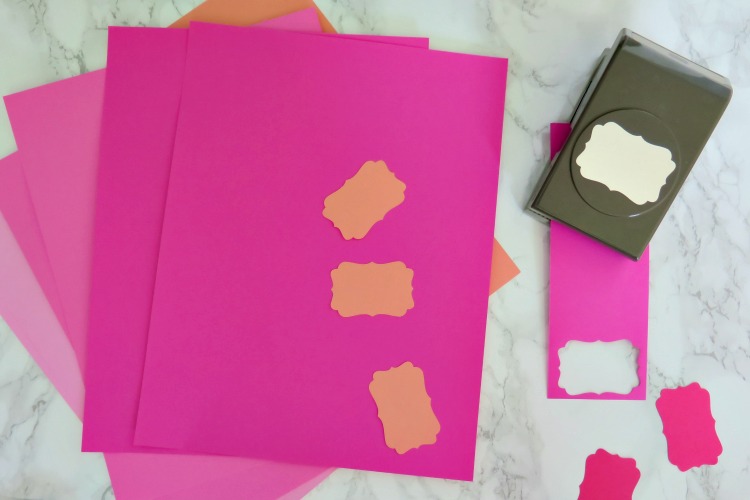
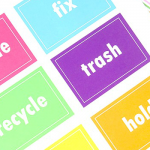
Measure the width and height of your box so that you can trim your card stock accordingly. My shoe box was mine was 10 x 7 x 4, so my card stock sheets were a LITTLE less than 7×4 inches. I chose light but bright colored card stock so that my labels would really stick out!
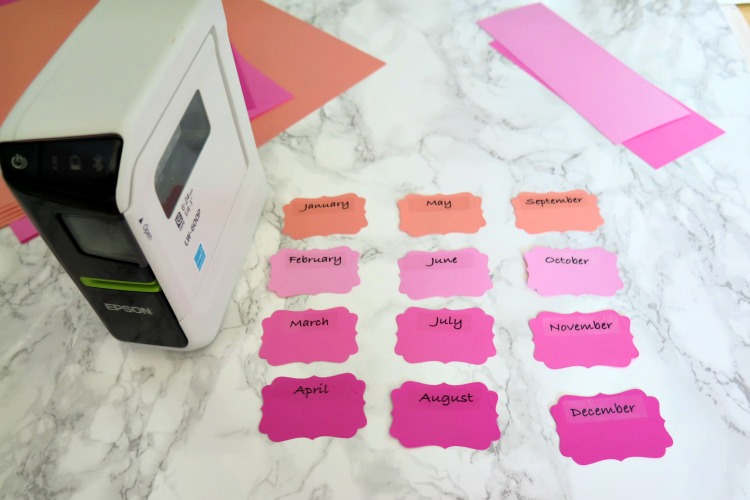
Using my dicut, I cut out the labels that would be placed on top of my cardstock.
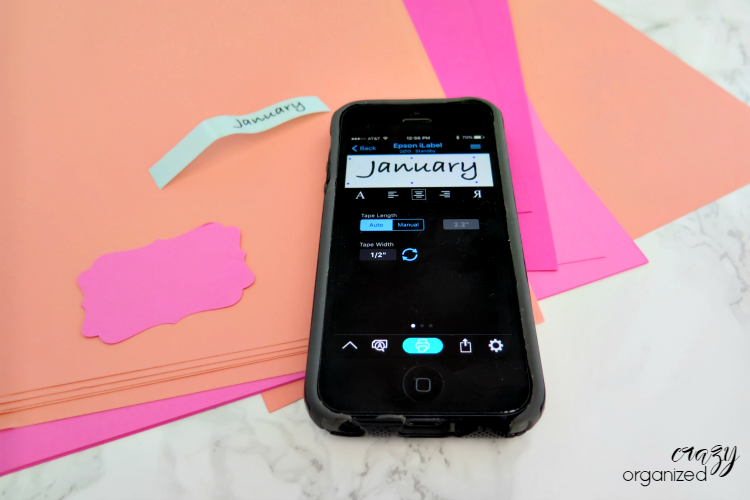
Now the fun part. I downloaded the Epson ilabel app that, once downloaded, automatically synced with my Epson Label Maker without having to register or sign up (just turn on bluetooth).
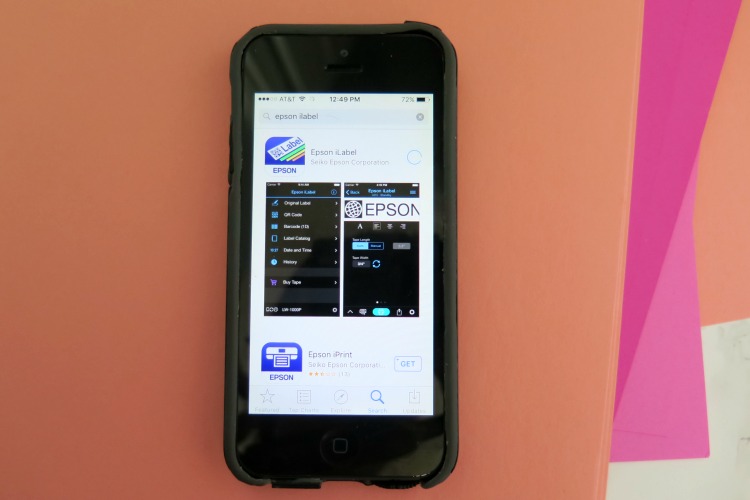
Using the Epson clear labels, all I simply typed out the label on my phone, choose the font & size, and hit the green printer button! No more running to my printer to make a label, as my battery operated Epson Label Maker comes with me everywhere, as does my iphone 🙂 .
I attached my labels to the top half of each of my dicuts.
After attaching tape to the bottom half of the card stock label, I taped my label to the middle of my card stock sheets. In effort to make it even, I chose not to eyeball ‘the middle’. Instead I measured out the half the width (for me it was 3 1/2 inches) and made a small mark. Don’t worry the mark won’t be visible as you’re putting your label right over it!
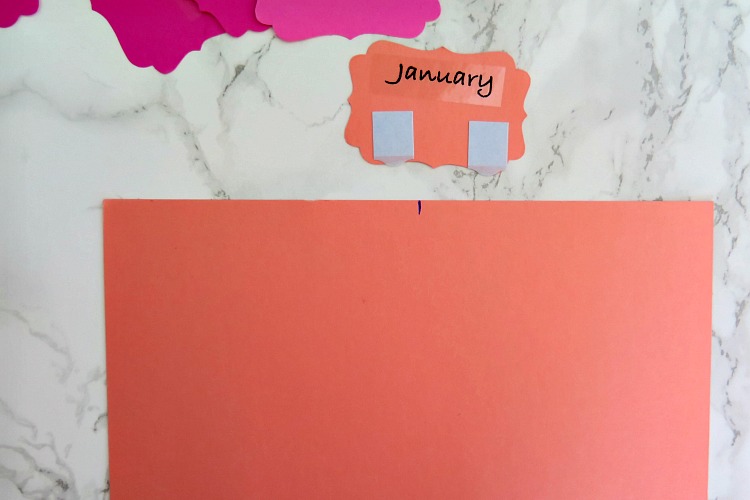
This made a huge difference and ensured all the labels were even right in the middle of the card stock!
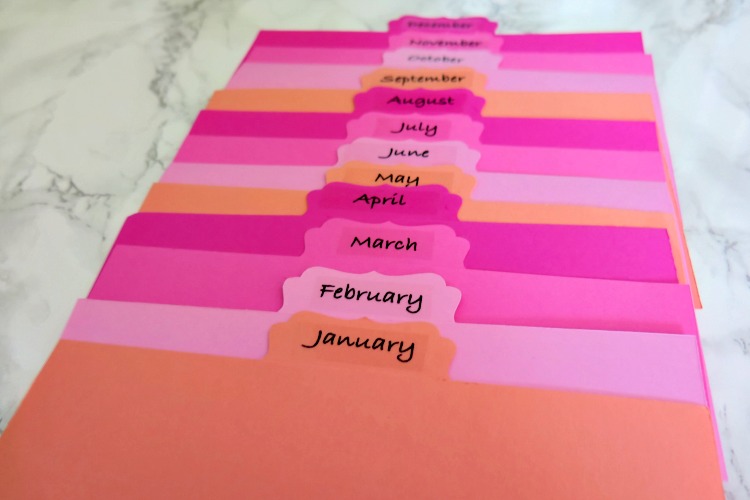
Now all I had to do was file my cards under the appropriate month! I also placed a post-it on each card with the recipients name and date to help when I pull out the cards for that month. I store stamps & a pen in the back of my shoe box.
Never again will I have to resort to texting “happy birthday”!

Oh, what pretty organizing! I love all the happy colors. I will so be copying your lovely idea, Lindsay. :)And then I’ll be crafting a bunch of cards (something I haven’t found time to do in much too long).
Awww thanks so much!! I LOVE making cards too, but have had such a hard time finding time!! 🙂
Looks really nice.
awww thank so much! And thanks for stopping by!
This is pretty and… well organized 🙂
Amalia
xo
Such a good idea, pretty AND practical – perfect!
I’m getting way to fond of my label maker! 🙂 Seriously, this is both cute and a great way to stay organized. I send enough cards now that it helps to have everything all laid out. So. Many. Birthdays.
This is amazing. I WISH I was that organized babes this is gorgeous too. I must make one. Although I am horrible at remember dates and anyone’s birthday so must make a masterlist of some sort first so I can begin to be organized like this what a great idea. You could even make these up and set as sets on Etsy or something darling. You would make a killing people like me like to buy these ideas because I never have the time to make them myself. Thanks again for sharing another amazing creation on #ShareWithMe
This is a great idea! I probably wouldn’t put all my labels in the middle, though. I’d do it in thirds, like the tabs on file folders, so none would end up hidden behind others.
My label maker is old, and I never knew you could buy one that syncs to an app (but why not? Everything else in the world has an app, right?).
Thanks for the inspiration. I’m working on organizing all my office stuff, so I’m saving this post.
You are SO organized. I love this idea. We have all kinds of cards floating around here. I can never find one when I need it.
This is so smart! I love how you made the tabs! Definitely adding this to my to-do list. It’s too pretty not to. 😉
This is so cute! What a great craft! And it will also force me to keep extra cards on hand. I always say I’m going to stock up, but I never seem to get around to it. Then when I need one, I don’t have it. I’ll be making one very soon. Thanks for sharing at Inspiration Thursday!
LOVE, LOVE, LOVE this idea!!! So pretty and you always have a card ready! Nice! Thank you so much for sharing at my craft party on Thursday! Would love to see your newest posts this week, which starts at 7pm EST.
I have a similar box for greeting cards Lindsay, so I know just how well this works. I love your brightly coloured box. Thank you for sharing at Shabbilicious Friday. I’m delighted to have pinned your project and to be featuring your greeting card organiser at tomorrow’s party.
Hugs ~ Kerryanne
Oh if only I could be this organized! You have a true gift and this organizer is so pretty. Found you at Funtastic Friday!