I love the idea of adding design with function since I try to keep to a more minimal decor style. That’s why having decorative diy coasters is right up my alley. And a DIY? Well that’s something I couldn’t resist.
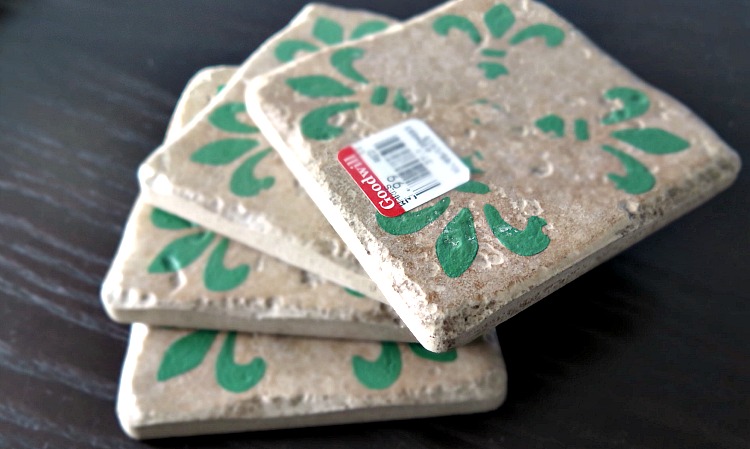
I found these coasters at Goodwill (for $2!!), although you could start from scratch using cork board or white bath tiles.
SUPPLIES
- Coaster material (whether old coaster or cork board or bath tiles)
- Painters tape
- Clear protecting spray (I’ve used this for quite a few DIYs, such as this)
- Paint brush
- Acrylic paints
- If you’re using cork board or bath tiles, I would recommend adding felt pads underneath to prevent coasters from scratching your table
Here’s some of my favorite coasters …. great for DIY inspiration!
INSTRUCTIONS
First step always is to wash and dry your coasters.
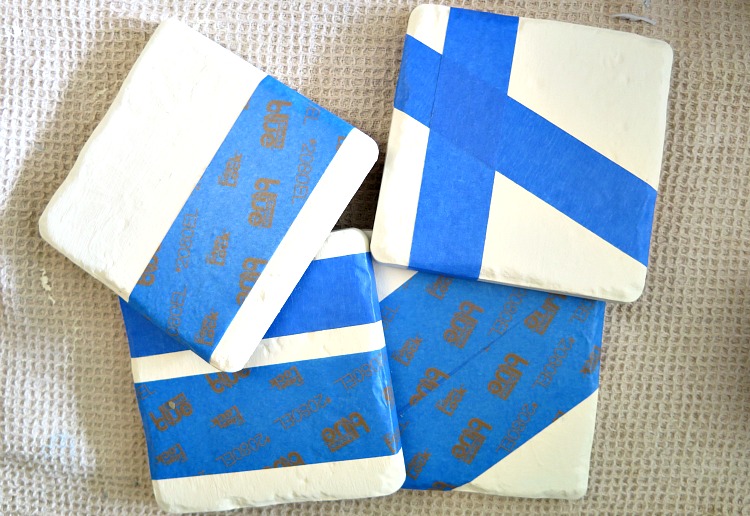
My next step was to paint each coaster white, including the sides. You may or may not choose to do this step, depending on the design you make.

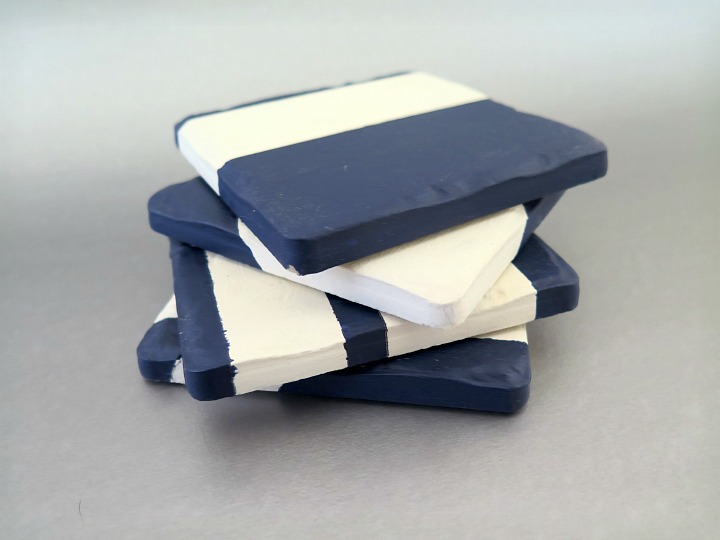
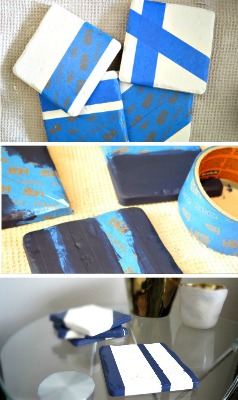
Once the paint dried (overnight), start placing the painting tape on the coasters in whatever design you choose! Personally I like the look of each coaster with a slightly different design, yet all being in the same color pallet. You really cannot go wrong with whatever design you choose!
Make sure your tape is long enough to wrap down the edges and underneath to help it stay adhered through the painting process. Press the tape down hard before moving onto the next piece.
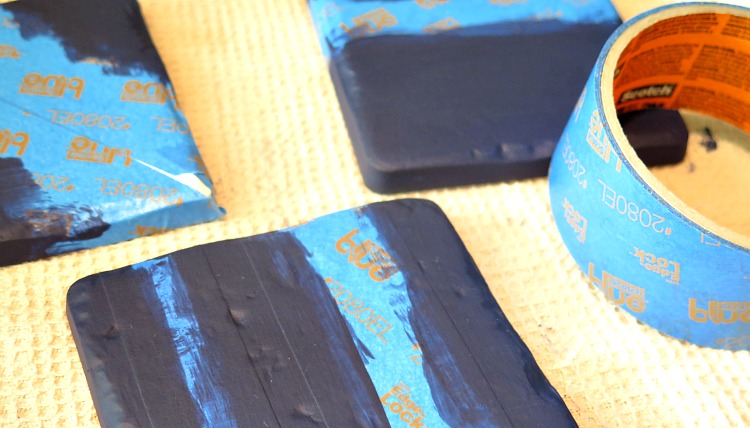
With each color you choose layer on at least two LIGHT coats of acrylic paint, waiting a minimum of 1 hour in between coats.
After putting the last coat of paint on I let them dry overnight before removing the tape just to ensure its completely dry. Then slowly and carefully remove the tape.
Best practice to protect the coasters with a waterproof sealant.

If you used cork board or tiles, your last step will be to add on a felt pad to each corner so they won’t scratch your table.
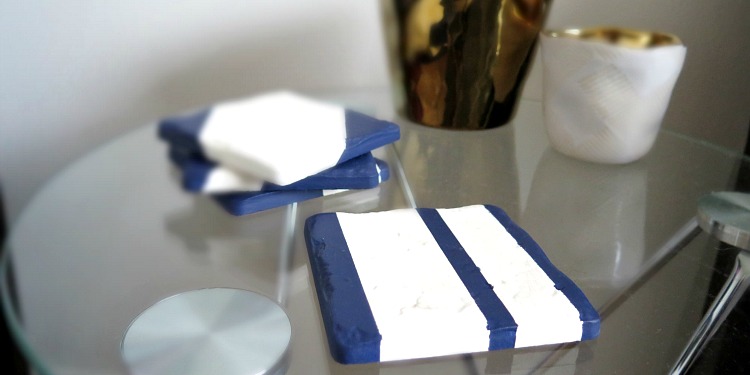
Now your only job is to decide what beverage to place on top!


Some of the links in this list are affiliate links. It doesn’t cost you any extra, but I earn a little commission if you decide to purchase. Regardless of whether or not I receive a commission, I only recommend products that I personally use and genuinely recommend!


I have always loved this idea! So great!
Thanks for joining Cooking and Crafting with J & J!
You found such a good deal at Marshall’s…BUT your DIY ones are way way cuter:)
Laura
http://www.24-7style.com
Ooh, what a great deal!These would make awesome gifts, too! Thanks for sharing at the Thoughtful Spot!
Hi Lindsay,
Your coasters turned out great and look simple to make yet modern and chic too. Thanks for linking to our Tips & Tricks linky party. I know people will enjoy this tutorial and I hope to see you again next week.
Patti~ Garden Matter
This is a great idea! I love creating things for our home and making our own coasters is a wonderful thing! I could even get my husband to make his own!! hahaha!
I had not thought of painting tiles to make coasters. I had always just Mod Podged a picture or piece of scrap book paper onto them. This opens up a lot of possibilities. Thanks for the great idea.
Your coasters turned out really cute! i think i’m going to give it a try too! Pinning this!
New follower!
I love these! I realized a couple weeks ago that we don’t have any coasters. I guess it’s time to make some!
Thanks for linking up with The Alder Collective! Your posts have been pinned to our group party board. We hope you’ll join us again next Tuesday at 8 pm EST!
That looks gorgeous! such a lovely idea… I like your DIY projects as they always come out amazing! #sharewithme
These are very cute! My daughter would love these as they would go perfectly with her decor! Thank you for sharing with us at Brag About It!
~Laurie
I have the tiles, I have the paints, I have the cork, and I probably also have the painter’s tape. It’s just a matter of getting around to doing it now! These would make nice gifts!
Very cute coasters and easy to make. I will have to give this a try.
Hi Lindsay,
These DIY coasters are so pretty. You did a great job making them.
Thanks for sharing this with us at Cooking and Crafting with J & J.
We hope to see you next week.
Julie xo
Cute idea!! I imagine they would look great in red white and green for the holidays!
Love your coasters, they turned out really pretty! I recently made some out of tile as well. They are really easy to make, and I love easy projects. Thanks for sharing!
They came out with a nice nautical feeling, something great to have when you are by the ocean sipping something fruity with a little umbrella in it.
Lovely. Pinning to Crafts Board. Best wishes for a wonderful weekend. Linda @Crafts a la mode
I ruddy love your crafts! These are such a good idea – and would make a great gift. Thank you for linking to #PoCoLo x
Cute! And what a deal! I love that you repurposed! Thanks for sharing on the Small Victories Sunday Linkup!
Oh these coasters are absolutely gorgeous. So clever and creative hunny. I love seeing what you will come up with next. Thank you ever so much for linking up to Share With Me. I hope to see you again tomorrow for another great round! #sharewithme
Very cute and simple!! Thanks for sharing on My 2 Favorite things on Thursday!! Hope to see you again this week! Pinned!
Lovely idea!
Wow these are great! I found some $2 coasters at Goodwill a few years ago and enjoyed redoing them with scrapbook paper and mod podge. I really like the paint idea though, and it looks a little heartier to leaky beverages than my scrapbook paper! Definitely pinning this to use later. Love simple DIYs!
Great coasters! Guess what! I loved this post so much that I chose it to be featured for this week’s The Beautifully Creative Inspired Link Party. 🙂 Go grab a button you deserve it!
Great idea! I had no idea you could paint cork. I can feel my crafty side wanting to come out. Especially around the holidays. These would make a great stocking stuffer. Thanks for sharing this at #SaucySaturdays
I’m guest cohosting the Motivation Monday link up and have featured your great DIY post! http://acupofteawithkelsey.blogspot.com/2015/11/last-minute-thanksgiving-centerpiece.html
That was so amazingly kind of you! So excited! Thank you SO much!