
Each month I’m taking on a common organization challenge and tackling it with a thrift store item. I’m here to prove that organizing doesn’t always have to be expensive. All it takes is a little patience, DIYing and a great thrift store find! This month we’re tackling jewelry clutter with a
||| Jewelry Holder |||
It’s gets better! I’m not alone in this challenge! Pairing up with 19 other talented ladies, we’re bringing you our monthly Thrift Store Upcycle Challenge. Each month we will create something amazing from an item(s) we’ve found at a thrift store, yard sale, resale shop etc. There is no budget or specific theme so we are free to let our creativity run wild!

Amanda | The Kolb Corner Chelc| Inside the Fox Den
Erlene | My Pinterventures Kim | Made in a Day Sara | Twelve on Main
Debra | Shoppe No. 5 Shirley | Intelligent Domestications
Marie | DIY Adulation Lindsay | Crazy Organized Michelle | Our Crafty Mom
Julie | Live From Julie’s House Dru | Polka Dot Poplars
Maureen | Red Cottage Chronicles Pili | Sweet Things Channell | Hobnail House
Colleen | Life on Kaydeross Creek Ann | Duct Tape and Denim
Paula | Virginia Sweet Pea Sherry | Savvy Apron Stacy | Anastasia Vintage
You can also follow our board on Pinterest for more upcycled decor inspiration!
One of the fundamental rules to keep your house clean is to simply put your belonging back where you found them. Well that’s nice and all, but how many of us always do that? If you walked into my house at any given day, you’d know I’m not one of them. Instead I like to have various ‘stations’ around the house where I’m allowed to put SELECT items instead of putting them in their home. Jewelry is just one of those items for me that rarely makes it back to its home on the day it’s worn. Instead it’s sitting on the dresser or in the bathroom, always with the risk it’s going to get lost.
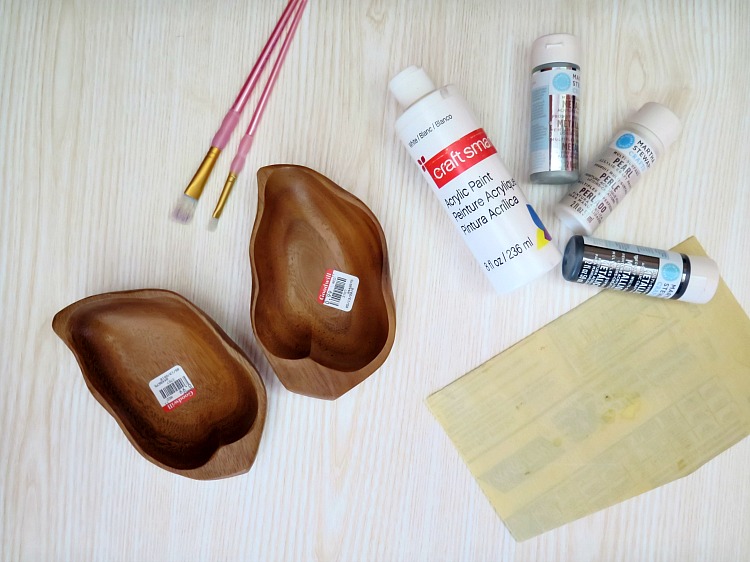
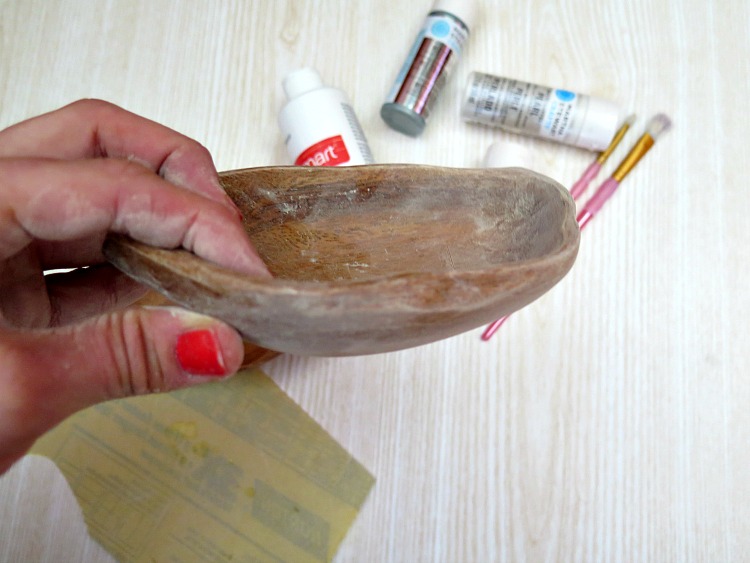
Jewelry Holder Supplies
- Acrylic paint
- Sand paper
- Paint brush
- Small wooden container (my thrift store find!)
- Glossy protective finish spray
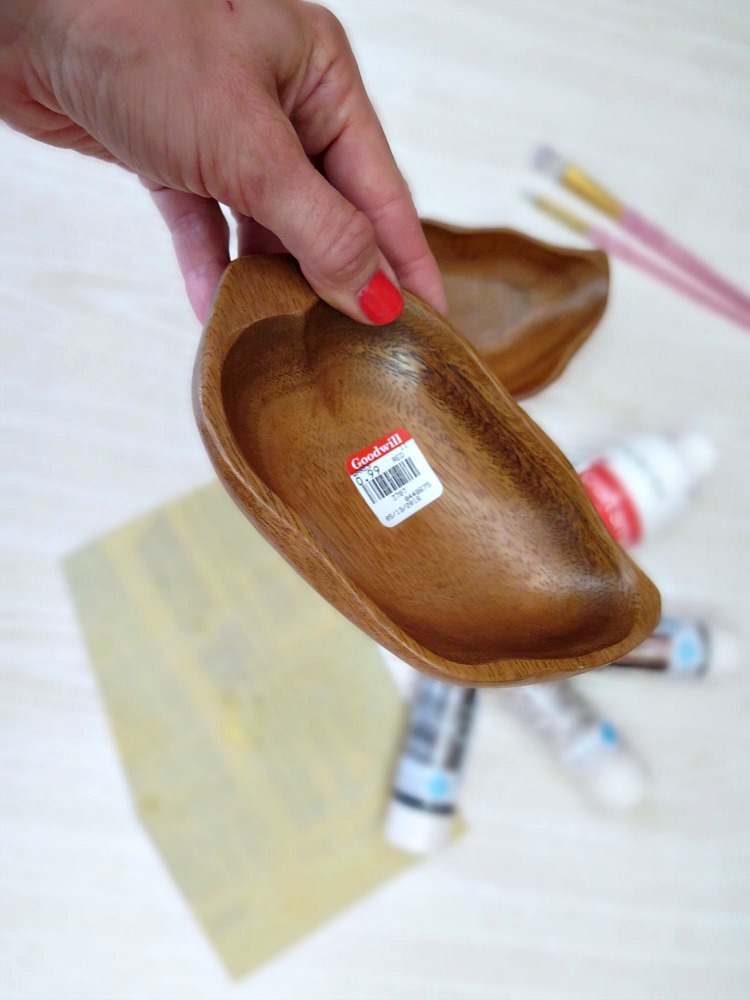
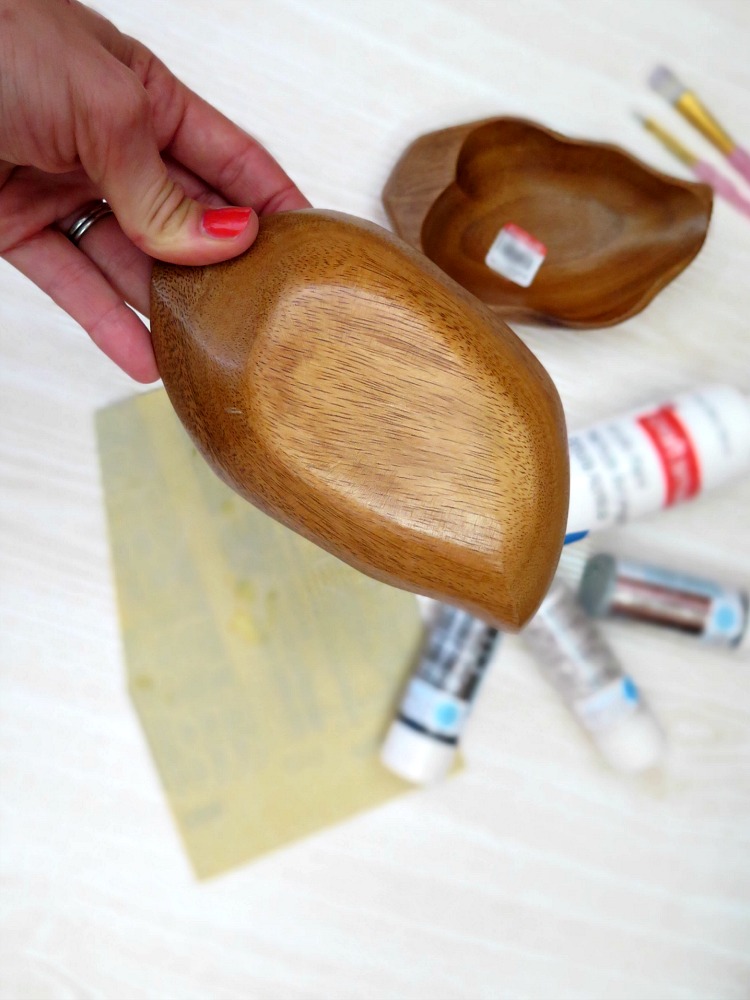

Before I ever get started with a new DIY, I ALWAYS wash the items that I’ll be DIYing, especially since this one is a used item. For the paint to apply as smooth as possible, you want a clean surface to work from. Once washed and dried, I got to work sanding. Sanding is an essential step in any wood repainting project. I tend to ‘oversand‘ as I’m oddly fearful I’m not sanding enough. Why??? I’ve been told over and over that just one quick sanding around the entire piece of wood is totally sufficient!
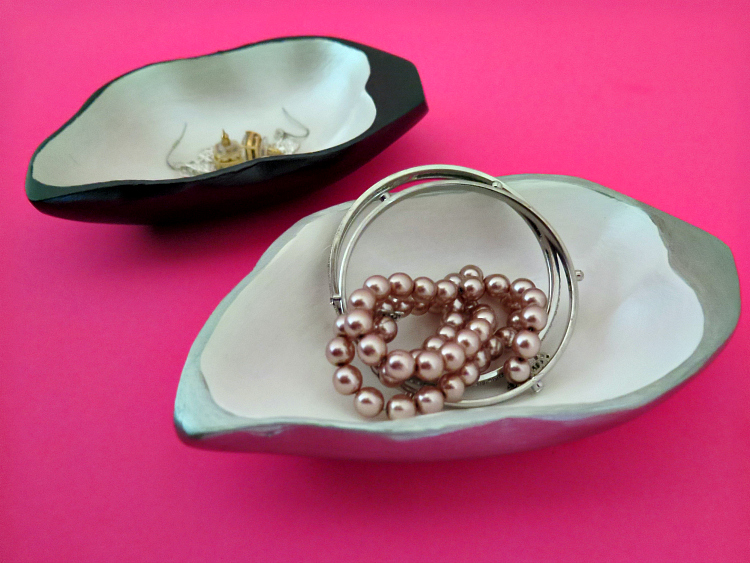
Once you’re done sanding, take a damp rag to wash off all that saw dust and dry. I started painting the inside first. It took two LIGHT coats of paint with at least 1 hour drying time in between coats to get the color I wanted (photo below is ONE coat). You’ll notice that I definitely did NOT stay within the lines when painting the inside. That’s completely fine! The next step is to paint the outside color and that’s where I’ll stay within the lines!
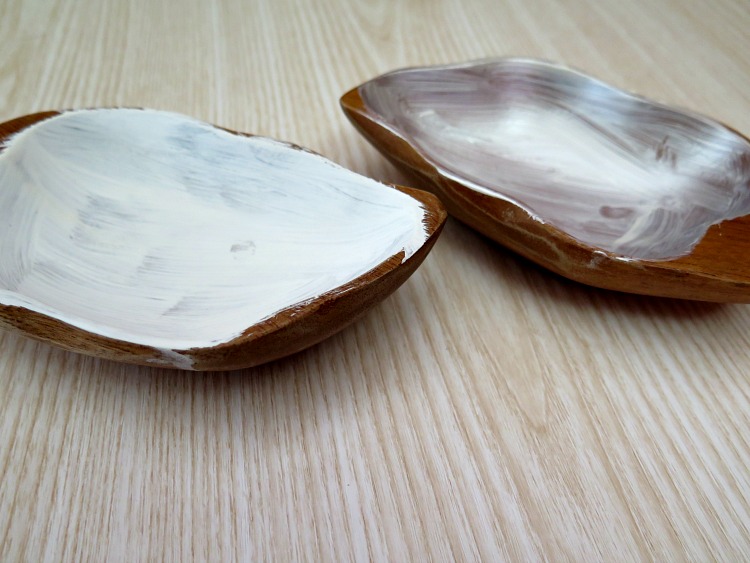

Once all the paint dried, I did a quick spray with a glossy protective finishing spray. Acrylic paint can chip, so it’s always good to use a protective spray before using.
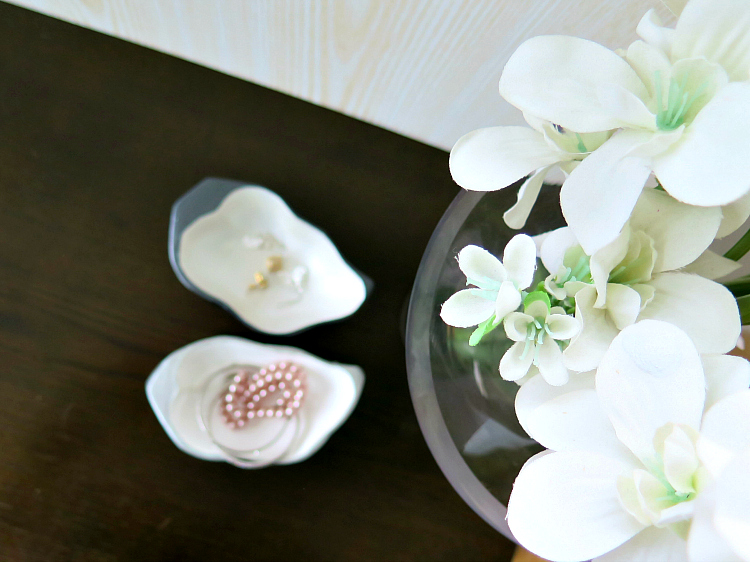
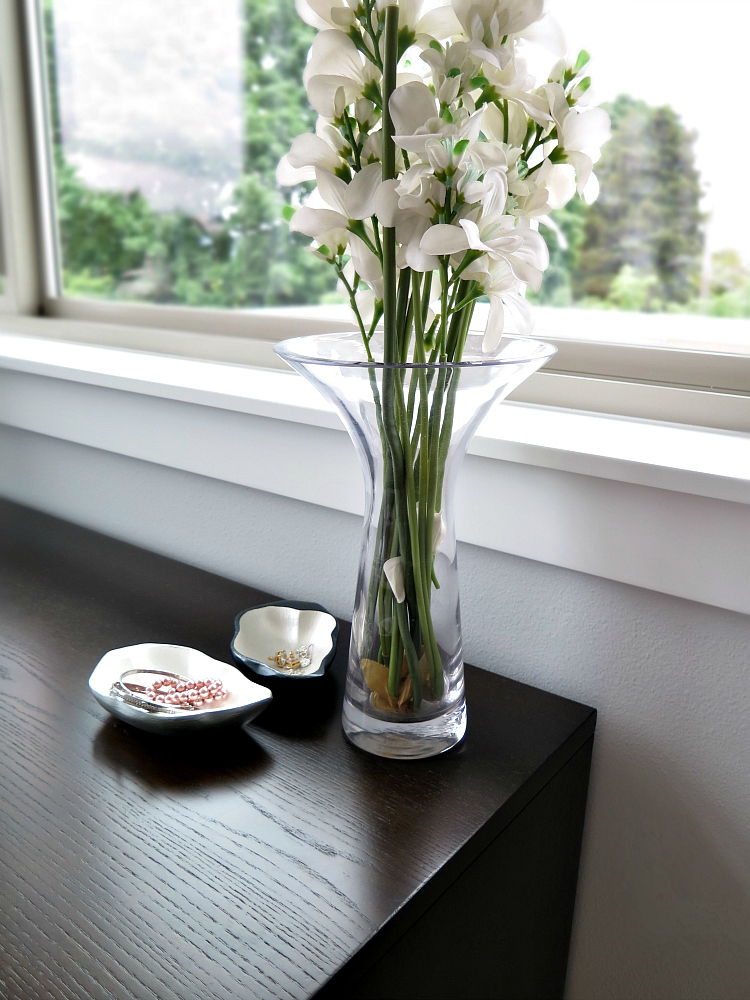
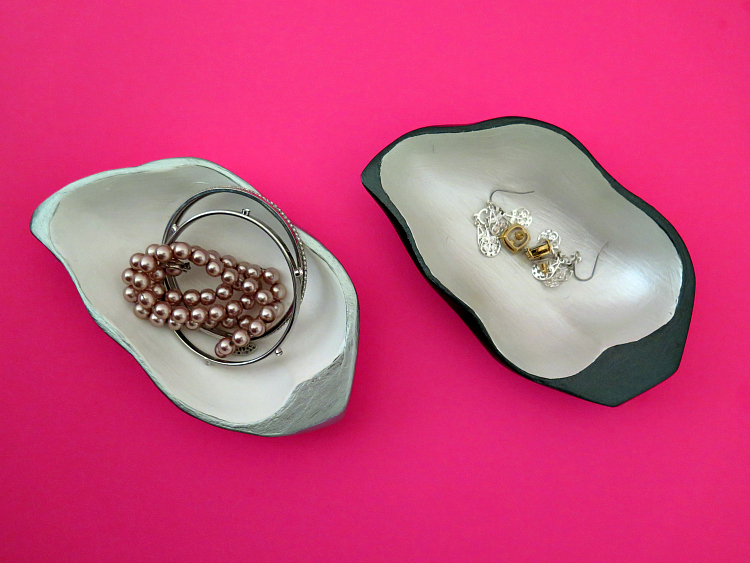
Now I officially have NO excuse to leave my jewelry sitting out!


Be sure to check out all of the other creative upcycle projects my fellow bloggers have come up with!


Amazing idea! i liked it 🙂 It looks so great! As a natural one…
Great update! I love the colors you chose. Amazing what paint & imagination can do!
I see these all the time at Goodwill. You made them look great! To me they look like oyster shells now and I really like that look.
The jewerly holders are so elegantt. At first I thought they were large shells. This is a great idea to update small wooden bowls.
At first glance, I thought they were oyster shells. They look wonderful in the colors you chose 🙂
I agree! They totally look like shells! Thanks so much 🙂
I’m totally guilty of leaving jewelry out and have actually lost an earring or two doing this. Have little areas to place them is a great idea.
Love this! They turned out so pretty; they almost look like shells to me!
Aww thanks dear!
Love them!! They look like real oyster shells, so classy!